Page 1 of 4 123 ... LastLast
Results 1 to 20 of 79

Thread: Miata into Exocet Build thread!

  1. #1

    Default Miata into Exocet Build thread!

    Now that the donor car has been parted out and I have some free time while I wait for the kit to arrive I wanted to start a build thread! I'm usually pretty bad at keeping these up but laziness be damned I will do it!

    Introduction:
    So one day im sitting there on the internet, minding my own business, and I come across this company making kit cars based on the Miata. It was based out of the UK and called MEV http://www.mevltd.co.uk/. Pretty cool I thought but with it being based in the UK there was no chance I was gonna take the risk with shipping overseas and possible returns if problems arose. Still it stuck in back of my mind and I followed progress of the kit. Then along comes Exomotive http://exomotive.com/ a company from Georgia who buys the rights to the kits and starts making them in the U.S. Well now im interested, but I still have doubts for example why does the rollbar seem like its already been in a crash....? Plus there were a host of fitment issues which I was not looking forward to as a first time kit car buyer. Along comes 2013 and a complete redesign of the kit utilizing cad and numerous other programs to ensure a huge increase in torsional rigidity with a minimal weight penalty (i think it was 20 pounds?) Plus they fixed the rollbar which was my biggest complaint. Couple that redesign, with the dustiness of my now ex track car a 2001 miata gathering dust in the garage and you have the recipe for awesomeness or an epic failure.

    What is an Exocet?
    Its a kit car based on a mazda miata underpinnings. Basically you remove all of the body panels from the miata and you are left with a rollerskate aka:

    Attach the supplied tube frame body plus about 40 hours of misc stuff and you are left with: (to be fair thats a turbocharged heavily modified one)


    The Idea:
    With this what I am hoping to accomplish is to create a four wheeled motorcycle with miata handling characteristics. Something that I can still drive to the track and be very capable on track. Shouldn't be too hard as I'm looking at somewhere between 1400-1500lbs fully loaded which is a far cry from the starting weight of the NB2 2387 lbs. Dropping that much weight off should make for a super fun track day car.

    My Vision:
    Since this is all about removing absolutely everything you dont need, I want to simplify the design aspects of the car as well. As such the steel frame will stay steel no colored paint, the aluminum panels will be brushed the wood splitter will be wood grained. Its a elemental approach to design which I hope will work out. If not then I can always paint it. But im pretty sure the nakedness of all the materials will work with the minimalist aspect of the car. Its consistency between the design of the car and the appearance of the car. Hopefully that makes sense if not then wait and see how the final product shapes up.

    Donor vehicle:
    Ive had my 2001 Miata LS for some time now and its gone through alot. Originally blue it was repainted black and was built up for track use. This means 949 6ul's, Fatcat re valved dampers, Sway bar+ endlinks, Sparco seat+ harness, Squaretop manifold, Exhaust, Header, Intake, and all maintenance done. All will be finding its way onto the exocet. Just about the only thing I really want to do is add a mega-squirt, and get up to 140+whp. Here are some pics from when I first got the car!


    Then right before I tore it all apart:


    Next up the tear down begins...

  2. #2

    Default

    Now the kit is ordered, deposit paid... This is starting to get somewhere! With a ton of help from this forum (thank you!) I got the miata completely disassembled and parted out.
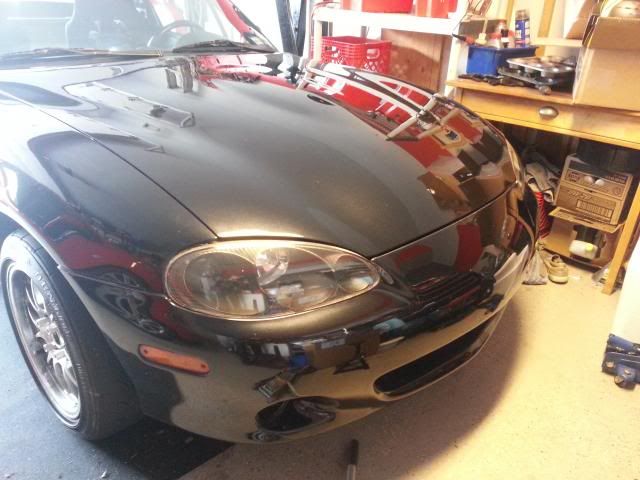
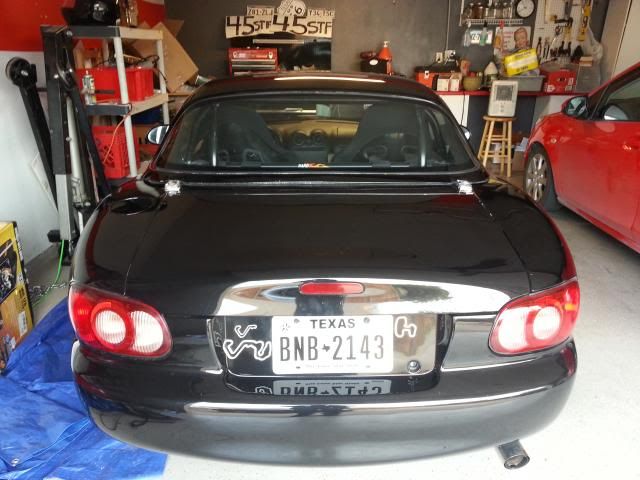
    First step is to remove the hardtop, get the seats out and remove carpet. You are left with this:


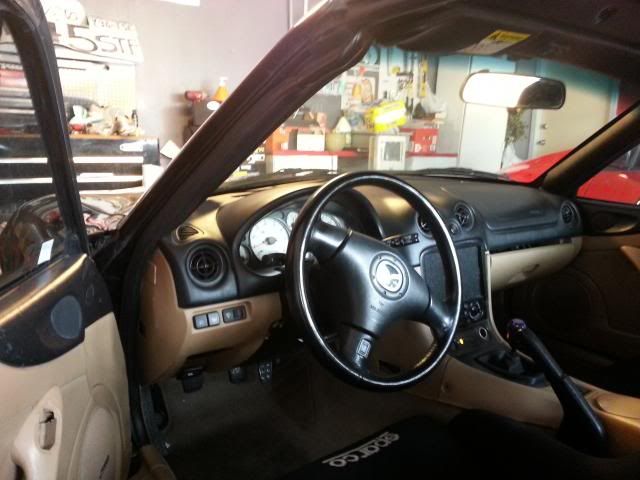
    Next up the rest of the interior came out. Removing the dash rollbar, doors. Actually wasnt that bad looking back on it, it was mainly set up a good playlist and let yourself get carried away with removing bolts till everything just lifts out.
    So then it was time to remove all of the stuff in the engine bay not attached to the engine such as coolant overflow etc. It left this:


    Actually in the picture theres still stuff to remove mainly the brake master cylinder but that was quickly taken care of!
    It goes to note that it helps a HUGE amount in this phase to label and bad EVERYTHING. I mean that random bolt that probably isnt neccessary that you just pulled out from the back of the dash? Label and bag it! Looking at the bolts now I have no idea where they go and its only because i labeled the baggies that I have any idea. The same goes for all the electrical connectors. I think I used a full roll of painters tape just labeling all the connectors so I know where they go when reassembly happens.
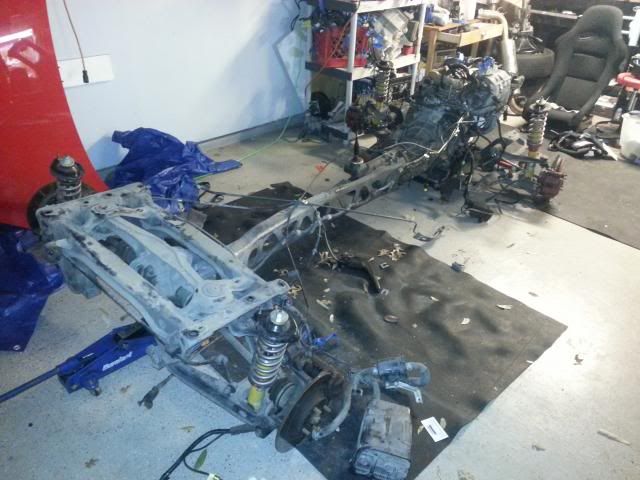
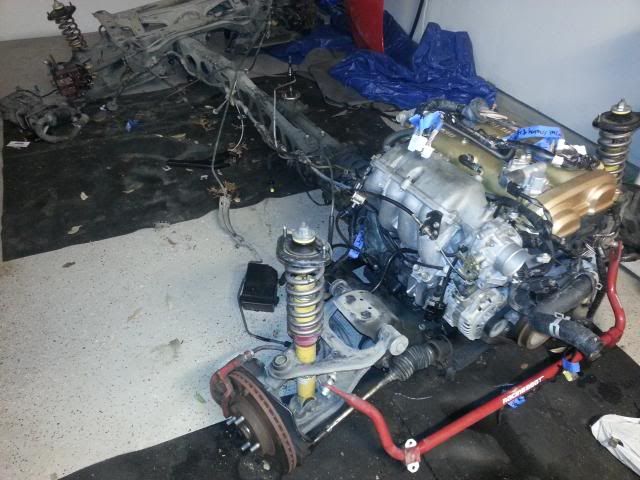
    Now that I have removed everything in the engine bay i have room to lift the body off the engine without ripping anything in half.


    Oh and also by this time I had removed the wiring harness from the interior of the car and pushed the engine harness through the firewall. Basically anything connecting the subframes/engines to the body of the car has to be removed.


    Now with everything disconnected we can start lifting the body off the car right?! Not so fast...


    Yeah learn from my mistake... Take the hood fenders and everything possible off of the car BEFORE you try and lift it up.
    It makes it unnecessarily difficult!
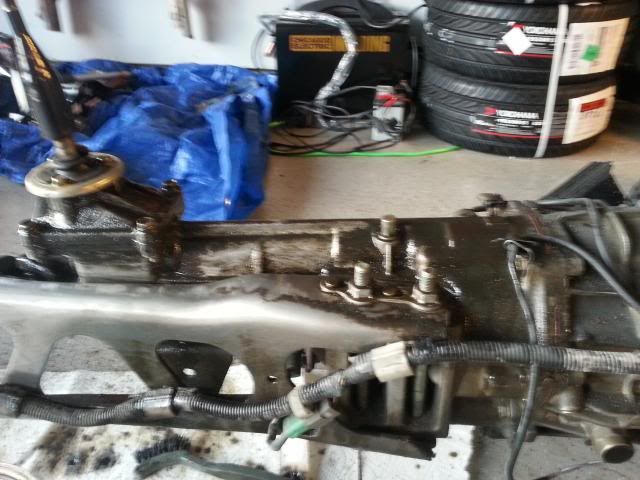
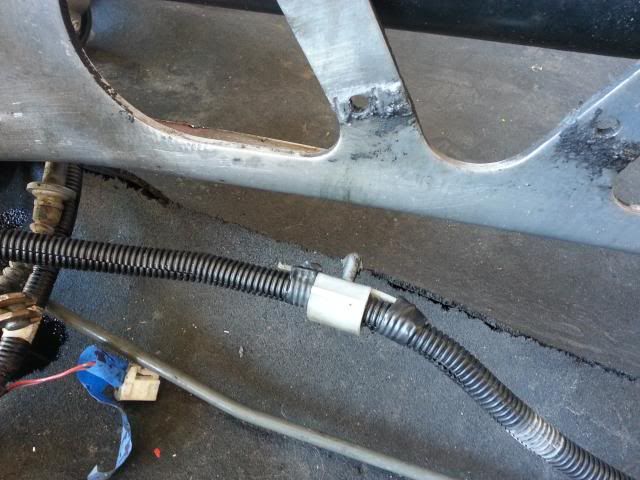
    Finally im getting some where after removing the grounding straps that everyone forgets!


    haha you can see my trusty blue tape and sharpie which was used extensively at this phase.

    All the body panels, there sure are alot!

    Next up final removal of body shell and revealing the unpinning of my miata!

  3. #3

    Default

    So anyone thinking of attempting this I just want to say lifting the body off the car is a huge PIA by yourself. You have to get the hoist positioned just right and just when you think its all going well it will slide down your chain and end up with the rear bumper on the ground and the front pointed to the sky. I highly recommend either multiple hoists or a ton of helpers to ensure safe removal. Of course I'm stubborn and in my 20's so I did none of those things. Luckily nothing I was keeping got damaged and only my pride (plus the ceiling) got bruised. Heres some pics from the big removal, I didnt take a ton because I was busy swearing and being stubborn.
    You can also see the gas tank which is reused in this one:


    Up up and its free! looks easy huh! only took 3 days to do it though lol


    Frame and Rollerskate separated at last!


    Its pretty empty in there...


    With that an awesome couple of dudes came down from Oklahoma to cart the shell away on the back of a trailer. I cant thank these nameless hero's enough, as im busy fretting over the position of the frame on the hoist they both grab an end and man handle it onto the trailer before I can say another word! I later came to find out they had just crewed on the 25 hours of thunderhill and have been endurance racing miatas in chump and other series for some time. Seriously cool dudes I hope they get to do something cool with it! They did mention it would make a kick ass simulator rig platform. Can you imagine driving a miata in simracing while sitting in an actual miata shell with miata pedals, dash and steeringwheel? Talk about realism! They were so cool I threw in the dash and other misc stuff just to see it come to fruition with the promise of when its done I want a go! We will see what comes of it.

    So that leaves us with the rollersake here she is in all her dirty glory full of texas dirt. The next part will be attempting to clean 13 years of dirt and oil off of the subframes and a lesson in not making things harder than they already are.

  4. #4

    Default

    If you ever need someone to stand around sipping a beer and cheer you on help out with this, I'm totally in if you're on the Dallas side of the 'plex.
    Last edited by effse7en; 03-09-2014 at 11:27 PM.

  5. #5

    Default

    Very awesome! I would love to do this ONE DAY but probably no time soon. Yall make me want to move to the DFW since yall have the Miata ships, autox events and fellow Miata owners to help and get help from. Look forward to your progress!

  6. #6

    Default

    Quote Originally Posted by effse7en View Post
    If you ever need someone to stand around sipping a beer and cheer you on help out with this, I'm totally in if you're on the Dallas side of the 'plex.
    haha watch out I might take you up on that when the frame arrives. I can always use another set of eyes to ensure im not dropping anything on my feet! Plus I got a bundle of dirty rags in the corner you can pass out on when you drink too much! Im in Addison so its actually pretty close to you I think. Sadly most from here on out is going to be planning, cleaning, speculation and waiting. While its an awesome product with good design they are a very small business with a ton of demand. This equals looong wait times. Im estimating 20 weeks minimum with it most likely taking longer. Ive been waiting 8 weeks and still no invoice, so customer service is not one of there strong points. Worst case it all goes wrong and I learn another lesson to not mess with what already works

    Stay tuned Mild OCD cleaning incoming. Inspired by Jeffbuc but unfortunately im not quite that awesome.

  7. #7

    Default

    Very excited to so how the build goes.
    Thomas
    V-to-the-Dub

  8. #8

    Default

    Wow, 8 weeks without even an invoice? They must be getting swamped with orders now that FM is selling it. I'd think that with the laser cut frame notches that it would be a little faster to put together now. Oh well, it will get here eventually, eh? then of course:

  9. #9

    Default

    Yeah its a bit annoying, but I accepted it going into it. After it was a pain just trying to get them on the phone to confirm some questions, I knew any contact with them would be difficult. To be fair if I called I know I could get an reply within a day but its not all that important as we had already discussed final price and options before the deposit was paid. Its just the official heres your total in writing that I feel the need for. I'm always paranoid they will build it then send an invoice for 10 million dollars and say I thought we were clear on the price... Ive had bad experiences with taking things on verbal agreement.

    Anyway! With the BEAUTIFUL weather we've been having I have the urge to get outside and do something. Well that something was ruin my fingers scrubbing all the crevasses on the subframes!

    For anyone looking to clean really really dirty oily grease filled parts there are alot of options out there. Not all of them work, in fact only a few work and only one of them was affordable. So I started with the dusty dirty and oily rear subframes. Under the layer of Texas dust was oil and under that was road gunk. This stuff was THICK like 1/4th inch of sludge.

    First tool for the job, a steam cleaner!

    Thinking that the heat would cause the gunk to simply fall off I gave it my best shot. It did get it clean but it took forever, like 20 min for a 3 inch portion of subframe. Unacceptable!
    Next up was a Harbor freight Power Washer

    Ive read this is more than enough to get it clean online so it should be good right, right!? Right?!?! Long story yes its faster than the steam cleaner and it got off the majority of the dirt but the parts were still dirty, for instance the PPF was black and i know its aluminum so it should be silver. Still were headed in the right direction but there has to be an easier way, enter my best friend in the whole world carburetor cleaner!


    I had this stuff from cleaning out my squaretop manifold a while back. I remembered how the gunk simply dissolved when using it on the manifold so why not the subframes. It was magic, I applied it to the subframes let it sit for 10 mins or so and revealed a brand new part underneath. Seriously it looks brand new, it even has the shine in the factory paint. Best of all, this stuff is $25 for the gallon much cheaper than an $80 steam cleaner and a $220 powerwasher! Another thing that was annoying is the pressure washer seemed to embed the dirt into the part, I may have had too aggressive a tip on it but say-lave.
    Heres as before and after with the gas tank.
    This is after steam cleaning and powerwashing. Clean to the touch but still discolored:


    Now after 5 min with the carb cleaner:


    Damnnnn! After that I was hooked, I cranked the tunes and started applying it all over, heres some more before and afters:

    The PPF and shifter turret before the carb cleaner:


    and now after!!:


    Now I usually dont go all super clean freak but I'm thrilled with the results, there are still spots where i missed such as the transmission but all in all a much cleaner platform to work off of.


    Compare that with this one and you can see the difference!

  10. #10

    Default

    Another side obsession of mine is improving upon Mazda's gram strategy. Its the same philosophy that bicyclists use to remove weight from there bike. A pound is almost impossible to take off a bicycle but take 2 ounces of weight off 8 parts and you end up with a pound. This manifested itself in the fasteners for the sub frame wiring for me today. I kept looking at them thinking there has to be a better way, and so I used the most important tool in any mechanics toolbox zip ties!!
    Heres the fasteners Im talking about


    Now theres nothing wrong with them except they are total overkill for holding the loom onto the PPF. Theres no force acting upon them its just there to keep them tight. So off they came


    And in there place went some color coordinated zip ties! Note im not finished with it at this stage.


    So what did this accomplish? To be honest not much but I had fun doing it and it improved the look over the bright white plastic clips. For those interested here is one of 3 bags of plastic fasteners I took off:

    and now the total zip ties that replaced them... drum roll please!


    Then since I was discouraged with the minimal loss, I ground off an unused bracket from the oem header and removed the airbag control box (from the wiring harness) plus wiring for a total of 5 lbs lost! Huzzah!
    I will leave yall with a final picture of my favorite cleaned part. This is the depowered steering rack I did a while ago. To be completely honest I thought I got this thing clean. I was gonna skip cleaning it during my frenzy but then a drip of carb cleaner revealed a gold shine. I realized that the bolts were supposed to be gold when clean not black! With a little elbow grease I turned it into this:

  11. #11

    Default

    Oh one more thing before I go to sleep. Ive heard there might be others building exocets in the metroplex anyone who knows of someone who is currently building one or has built one let me know I would love to talk with them, share ideas troubleshoot etc.

  12. #12

    Default

    I had a question about registering this creation after it is finished, I realized that it might be useful for anyone else looking to do this, so here is the answer I gave. let me start by saying these are what I have found from my research ONLY. Your experience may differ significantly, and the process may have changed even by the time I get this finished and am trying to get it on the road. But it is possible to get it on the road even in an ob2 county. I hold no responsibility for any information given bla bla bla

    Oh the fun of registering the thing, That will be without doubt the most difficult part of the project. I have talked to a few others who have registered kit cars in Texas, and they all have different ways of doing it. Most kit cars on the road today are street/hot rod classification of vehicles aka cobra replicas. The qualification for those is like 1960 or older so it doesnt apply. Heres info from the TXDPS website:

    -A street rod is a vehicle manufactured before 1949 or after 1948 that looks like a vehicle manufactured before 1949.
    -A custom vehicle is a vehicle at least 25 years old and of a model year after 1948 or built to resemble a vehicle at least 25 years old and of a model year after 1948

    The other way of doing it is called an assembled vehicle, heres the info from the DPS:

    -Vehicles are required to meet the emissions standards for the year the vehicle is assembled. Vehicle manufacturers have to certify that their vehicles meet EPA emissions standards. Many kit car manufacturers comply with this requirement. If you purchase a kit car, follow the instructions on assembly, including the emissions components. The vehicle must pass an emissions test just like any other new vehicle. (aka no emission testing for the first 2 years)

    -Just as the EPA does not allow an individual to reverse engineer a vehicle to defeat emission standards, they do not allow an individual to build a brand new "old" vehicle to bypass emissions standards. It is possible if you actually use old parts (like a 1965 engine, or complete 60s frame and power train) that the vehicle will be registered as that model year (replica), but that is determined by TXDMV. The inspection station will follow the registration classification on the vehicle in determining the inspection criteria.


    What that all means is that from what I've found if I complete the vehicle in 2014 (god i hope so!) and get a assigned vin for it in 2014 on the title it will be labeled under make/model as 2014 assembled vehicle. This is kind of a catch all for vehicles who have been assembled from different makes/models or vehicles using a kit. aka kit cars.
    Now the difficult part comes when you go to the DMV, it totally depends on the person behind the counter. When I was doing research some days I would inquire as to how to get an assigned vin and the person would say theres no such thing move along. Other times they would let me talk to there supervisor and allow me to show them where in there handbook it describes an assembled vehicle. Expect numerous trips and tons of trouble. In fact if its possible to schedule an appointment with someone who knows about assembled vehicles do that. From what I gathered, and again I have no idea if this works we will see when I try it, this is how it goes.

    Bring the Assigned vin form from Exomotive to the DMV (i think its the dmv?) Also bring all of your receipts and proof of purchase for the parts (aka miata and exocet) fill out the form for an assigned vin number. The form gets sent off to austin if its approved you have to have a police officer come to where the car is and apply the vin number (again no idea how you go about doing this). He signs off a piece of paper saying it went on the right vehicle. At some point you have to take the kit to an inspection station and get an inspection to prove its roadworthyness. Now on this some things ive read say you have to take it to an ase certified mechanic/ inspector and some say just an inspection like you do right now. The vehicle has to pass a 2014 inspection meaning no emission testing just tires, windshield wiper (buy a manual marine wiper) Under the law it never states that you have to have a windshield just that the wiper must be able to remove obstructions from sight. Belts and other stuff. Note that after the initial 2 year new car grace period you will have to pass OBD2 tests as well so no check engine lights. Then you fill out an application for title at the DMV, under make model you put 2014 assembled vehicle and pray the behind the counter lady/man doesnt flip out and say thats not an assembled vehicle. IF they do that then you have to get the manager and show them in there book where it describes what an assembled vehicle is (they really really dont like this). Once the application is approved by austin then you are send a registration form and your title. Once the registration form is processed you can get your license plate and your good to go!

    Whew that was quite the essay sorry bout that but its a really involved process.

  13. #13

    Default

    Just a thought re zip ties: I'd be concerned that over time they will become brittle and break...
    SOLD - '91 BRG
    SOLD -'99 Signal Green
    Looking for my next car...

  14. #14
    Prefers his T-Bones Deboned... jeff_man's Avatar
    Join Date
    Dec 2006
    Location
    dallas
    Posts
    2,133

    Default

    Called and talked to them today to get some questions answered. Emailed an hour ago my list for a quote. I will be taking everything apart, cleaning ,grinding, painting before I put it all together..... If I can convince my self to order one. 16 week till it would get here so guessing more like 20.

    Going full cage, keeping the mp62, seeing if I can find a lower profit radiator or if I need to sell the TDR FMIC and build a new one.

    How much to rent the power washer off you?
    Last edited by jeff_man; 03-12-2014 at 05:37 PM.

  15. #15
    Driver BigDmiata's Avatar
    Join Date
    Jan 2004
    Location
    Just west of East (land of Gar)
    Posts
    535

    Default

    Bluegs03 I love the cleanup work you've done so far. I'm hoping to do the same with my '93 in the future.

    And holy crap, a jeff_man post that was coherent.
    2013 Mazda2 slushbox daily
    1993 Miata (future exocet donor)

  16. #16

    Default

    BigDmiata, Thanks man, its strangely therapeutic washing away years of dirt and grease.

    Jeff: Really you talked to them on the phone? Maybe they are getting better, I should give them a call and bug them about my invoice. Heres a little nudge that helped me convince myself to order. Its actually alot cheaper than I thought. Its hard to get over the sticker shock on the race model, $8000 is alot of money. Plus you have shipping $600-700 delivered to the nearest dallas freight depo and taxes $350+. That being said im sure you can offset that alot by selling parts off what you dont use. I made $2700 selling off parts that I didnt need from the miata. I could have made more but I didnt want the hassle. Plus I placed an order when they were having a $500 discount if you ordered before the new year. That plus I am opting for a no bodywork option (i want to try making my own) which is taking off another $1500. That almost halves the cost of the kit! Then you get to stagger how much you pay on it. $2000 will already be paid on it when you order it, so the way I look at it you dont have that much more to put towards it. If you think about it, this project might even cost less than your whole superchager setup did, and you get a similar boost in performance!

    If you really wanted to rent the power-washer I only ask that you put a deposit down as I have never met you in person before. It of course will be returned when the machine is returned.

  17. #17
    Prefers his T-Bones Deboned... jeff_man's Avatar
    Join Date
    Dec 2006
    Location
    dallas
    Posts
    2,133

    Default

    Down payment is made. Color samples in the mail.

    I really want to see yours when I comes in. Need to start R&Ding how to run a TDR FMIC with the kit.

  18. #18

    Default

    I wish I had the time, talent, and money for this. Interested to hear about progress on both your cars.

    Whats the weight difference between the excoet and a gutted miata/spec miata?
    SOLD - '91 BRG
    SOLD -'99 Signal Green
    Looking for my next car...

  19. #19

    Default

    And, 10" 6ULs start to make sense on one of these...
    SOLD - '91 BRG
    SOLD -'99 Signal Green
    Looking for my next car...

  20. #20
    Prefers his T-Bones Deboned... jeff_man's Avatar
    Join Date
    Dec 2006
    Location
    dallas
    Posts
    2,133

    Default

    Quote Originally Posted by MoonieGT View Post
    And, 10" 6ULs start to make sense on one of these...
    Only Hohos come in over 225 in a 15 so not worth running a 10". The lighter the car the smaller tire you can run but I'm stilling with 225/45/15 on 9s.

Page 1 of 4 123 ... LastLast

Similar Threads

  1. Insane build thread on Miata Turbo
    By black roadster in forum Miata Tech and Chat
    Replies: 6
    Last Post: 02-22-2014, 09:03 PM
  2. '97 Miata M Edition build thread
    By whoswatchingme in forum Miata Tech and Chat
    Replies: 39
    Last Post: 02-21-2014, 02:33 PM
  3. Replies: 26
    Last Post: 08-24-2013, 07:12 PM
  4. 2000 Miata LS build thread-whoswatchingme
    By whoswatchingme in forum Miata Tech and Chat
    Replies: 9
    Last Post: 07-18-2013, 10:05 PM
  5. Project Miata: Build Thread
    By offsprg01 in forum Miata Tech and Chat
    Replies: 39
    Last Post: 02-22-2012, 04:30 PM

Posting Permissions

  • You may not post new threads
  • You may not post replies
  • You may not post attachments
  • You may not edit your posts
  •