Reply With Quote
Exocet is around 1550lbs and a Spec Miata is 2300lbs. Huge power to weight advantage for the Exocet.Originally Posted by MoonieGT


Interesting. I would have thought that with the amount of speed that thing will carry through the corners, not to mention the added power from the SC, you'd want/need more rubber.
SOLD - '91 BRG
SOLD -'99 Signal GreenLooking for my next car...
Exocet is around 1550lbs and a Spec Miata is 2300lbs. Huge power to weight advantage for the Exocet.
2013 Mazda2 slushbox daily
1993 Miata (future exocet donor)
I didn't realize SM was so heavy. I assume you could build a 2000-2100 lb miata if you weren't building to SM rules? Or is it just that heavy?
SOLD - '91 BRG
SOLD -'99 Signal GreenLooking for my next car...
For spec miata 2300lbs is the rule, but I believe includes the drivers weight. A stripped miata can get down much lower. My old '97 miata was 2150 with a rollbar, full interior and a 1/4 tank of gas. It did have the a/c and p/s removed though.
2013 Mazda2 slushbox daily
1993 Miata (future exocet donor)
There is a 245/40/15 in the works from maxxis, something like 80tw and 100tw options.
I like running people over on rivals, they have a lot of grip for a 200tw. Same lateral as an nt-01 but not the same under braking but going from a 2400lb (full tank and driver) to a 1600lb car will change that.
So I have a question for the fine folks at DFW miata, im stuck on which headlights to get for the project. I am looking at a few options, theres obviously the one offered by Exomotive for $145 https://squareup.com/market/exomotiv...eadlight-black But its $145, and if I have to pay it then I have to pay it. But $145 for a set of headlights seems excessive. Honestly I was thinking of using projector housings as headlights then sticking DOT legal bulbs in them. Something like this but obviously on the exocet.
Upside is that they should come out to about $50-60 instead of 145+ship... But the downside is that all headlights and lighting equipment must be DOT approved to pass inspection. Normally I'd laugh as this is a non issue as long as they arent a strange color, but since this is going to be an different vehicle it might arose suspusions when its inspection time and they could technically fail me for non approved headlights? Then again the exomotive ones aren't dot approved they are "e-marked" whatever that means.
So what do you guys think go with what is known to work on almost every exocet, the dominator ones linked. Or try projector housings and save some cash for trackdays? Another option is to use the projector housings out of some old headlights I have lying around which had DOT on the headlight housings... Hmm decisions decisions
Cool dude from Oklahoma, checking in!
Thanks again for the chassis! I haven't started anything on it yet, but I'll let you know when I do!
You might want to check with FM, they are working on lighting kit for the exocets I believe.
2013 Mazda2 slushbox daily
1993 Miata (future exocet donor)
Hey welcome ILoveofframps! Glad to see you found the thread, no THANK YOU for making what could of been a nightmare into a breeze of a job. Plus you drove all the way from OK! Ill be following your progress, its always fun to see what happens with all the people I've met through this project.
BigD: Good idea ill give em a call and see what they have come up with.
Got my final quote sorted out and paint picked out. Looks like mid June it will be here but the 99 is going to Cota for it's last track day 28/29th. Will be a fitting end for an ugly ass fast car.
Okay got in touch with Exomotive and got an invoice huzzah! They even remembered all the fiddly stuff like the holiday discount and everything I was impressed. Right now they are building chassis 48,49,50 and mine is #71 at a rate of 2-3 per week it would take a maximum of 10 more weeks for the kit. Hopefully it will be quicker than that due to no powdercoating or body panels but it will take as long as it does. Hard not to get nervous though and fidgety, I almost bought a FD Rx7 shell the other day. Just because hell why not right?! One project at a time....
Finally an update!! Exciting news the kit has landed in dallas! So this build should have a few more updates comming soon. Also im planning on picking up the kit tommorow. I know some of the guys on here wanted to help when it came in. If thats still true let me know and your more than welcome to help with the pickup and man handling the crate around. Plus it would be awesome to share it with others.
Im located in Addison so north dallas kinda. Its nearest to midway and beltline. I have a guy helping with the unload of the crate so hopefully it will go smoothly! We shall see ill have updates tomorrow!
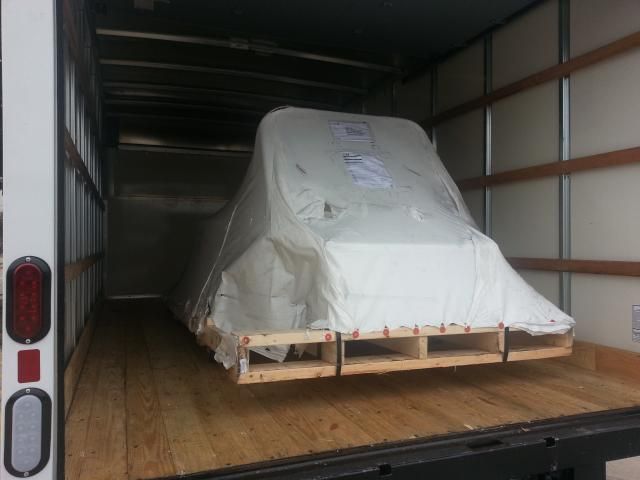
Whew what a day, I picked up the kit today from UPS Freight. The original plan was too borrow a friends trailer/suv. Of course hes out of town when I have a day free to pick it up. So off to budget rentals to get a massive moving truck thing.
And what do you know it fit in there with room to spare! This is the first glimpse I had of the kit. It was very very well packaged. They have switched to a new shrink wrap plastic stuff for the outside which works well with the foam padding underneath to keep everything nice and protected.
And one more badly lit picture when I got it home.
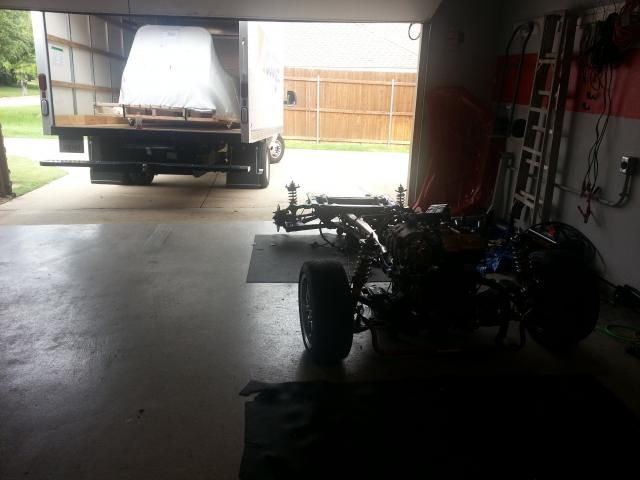
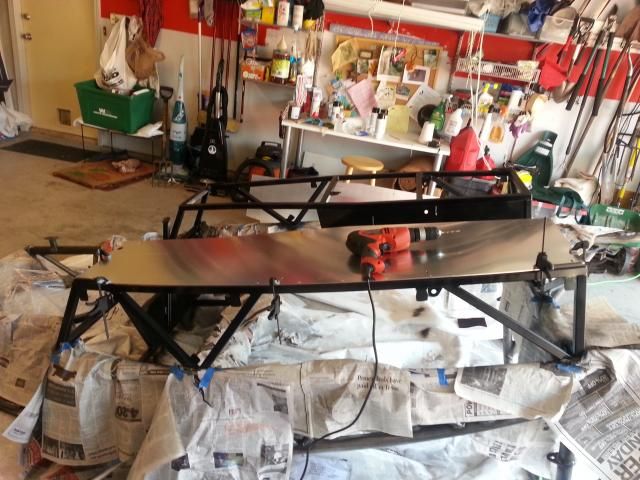
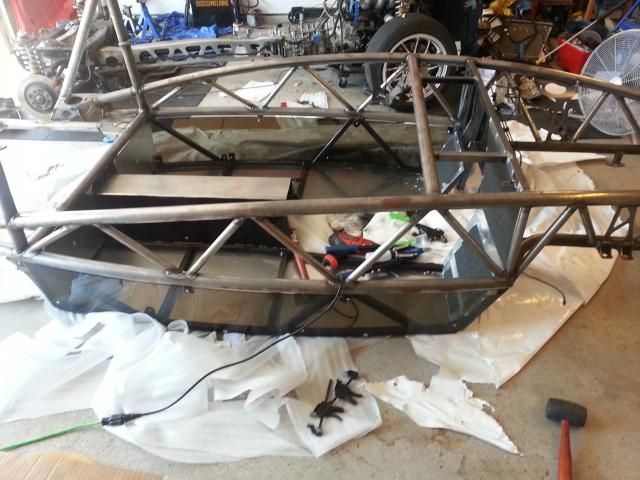
Then I had a super helpful friend come over and get it off the Truck and into the garage. At this point I was pretty excited so I stopped taking pictures and tore the wrapping off like a kid at christmas. Then of course we had to put it ontop of the subframes for the full effect.
Next up is taking it off again and fitting the floors/bulkheads. I ran out of energy dismantling the shipping pallet before I could get them on.
In all it was an amazing day, one I have been waiting on since January when I placed my order. I keep going into the garage and making sure its actually there it doesnt feel real.
A point of annoyance though, no instructions with the kit they have them online in the build guide but how hard would it be to print them out?
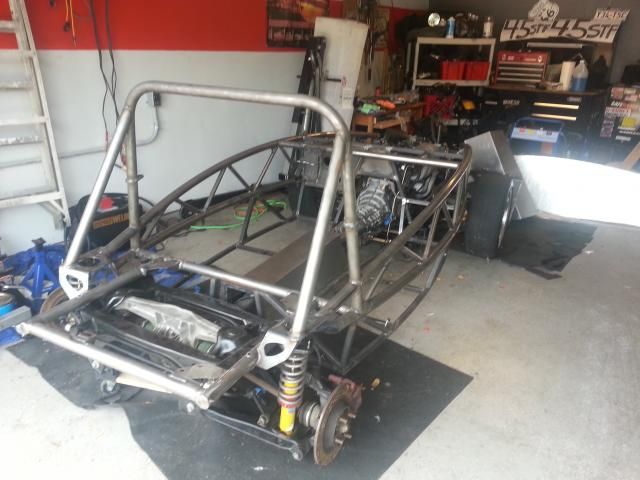
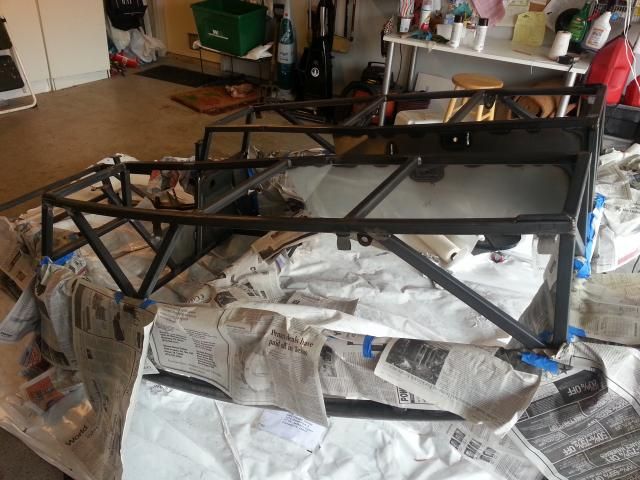
Other than that I'm very impressed the kit is VERY well built super strong. I wouldnt be surprised if it is stiffer than the miata tub. Thats without the welded in steel floors/ full cage/ diagonal braces. Its also got a huge amount of room for taller drivers. Elbow room is at a premium though. All the welds look strong and well done. Very happy I waited all this time.
More pics etc coming soon.
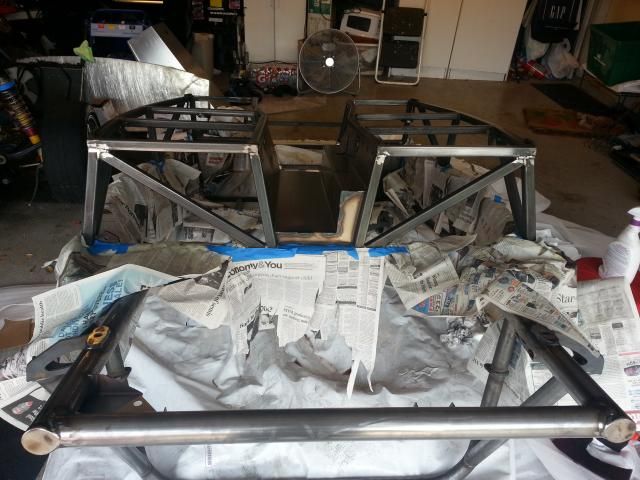
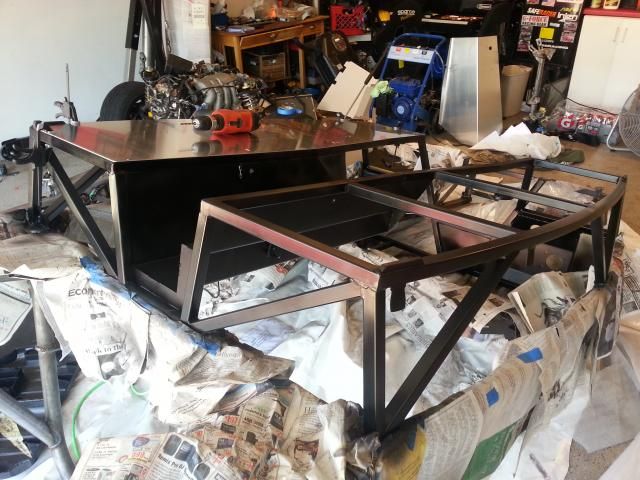
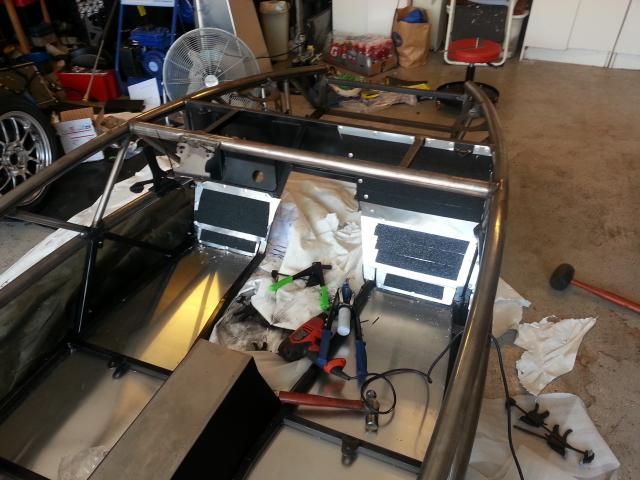
Okay update time. Ive been very busy working on this and the updates have been slacking. Its so easy to get in the zone and before you know it 4-5 hours have passed! So when we last ended the kit was placed ontop of the frame. I took it off and flipped it upside down to fit the floors. Due to cheap drill bits this was a pain until I man'ed up and bought some cobalt bits which are AMAZING. Then I masked off the areas that I wasnt going to paint. I gave the tubes that arent going to be shown some paint. I choose a black outdoor paint to hopefully help with water contamination/rust in the future. ALL of the ones I painted aren't visible from the outside of the car as they will be covered by panels or inside the car.
And after the painting, showing the finish which can be hard to see.

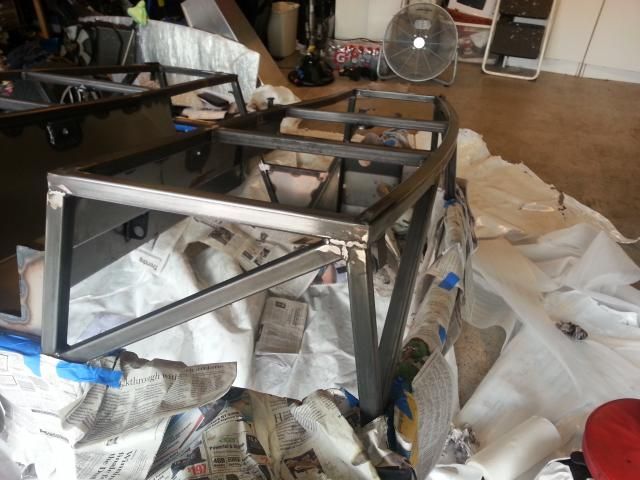
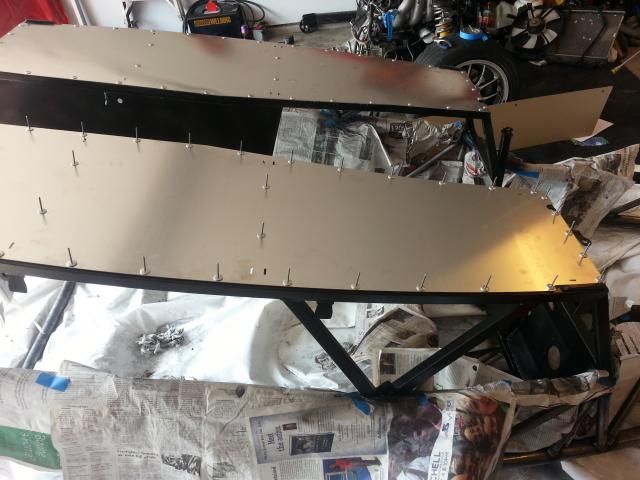
Next up was the floors, as I said before after getting the right drill bits these were a piece of cake. There are pilot holes to start your bit in and all of the panels are lazer cut so its milimeter accuracy. Now the installer aka me has little patience for milimeter accuracy so I squared it up the best I could and got to drilling! It came out pretty awesome there is no overhang and all the holes are in line.
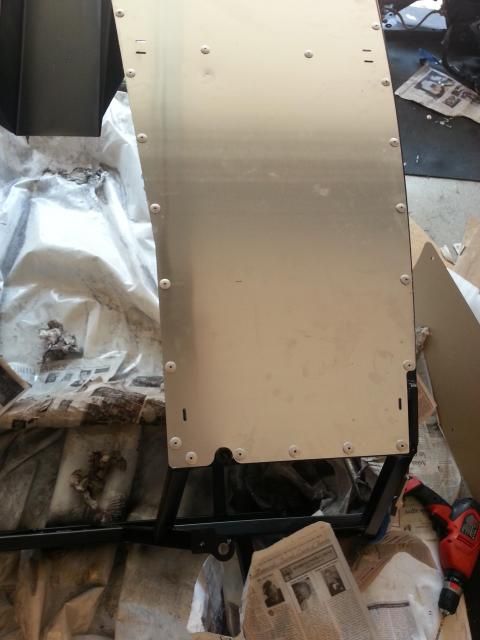
You can also see the clamps I used to hold the panels in place while drilling, very important so the panel doesnt shift and half of your holes dont line up.
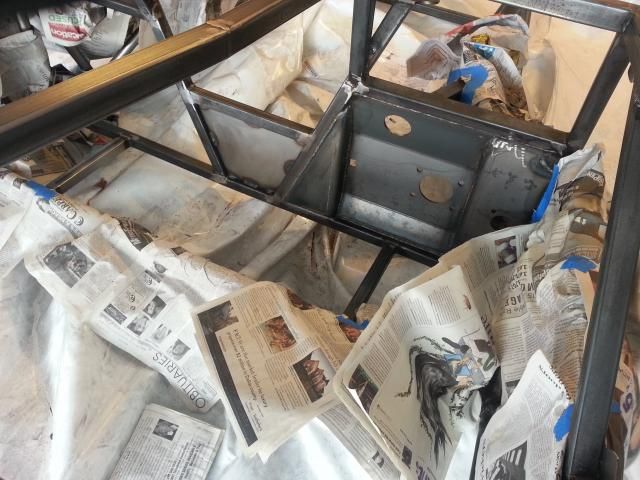
Then the panels were taken off and cleaned of all the metal shavings to prevent shavings getting trapped and squeaking me to death. Also a thin bead of clear rtv was applied to protect the holes from contaiments getting in them, also it helps with squeaks as well. After that they were all riveted in place for good!
I really like rivets being that its my first time using them, it gives the whole thing a very vintage aircraft feel.
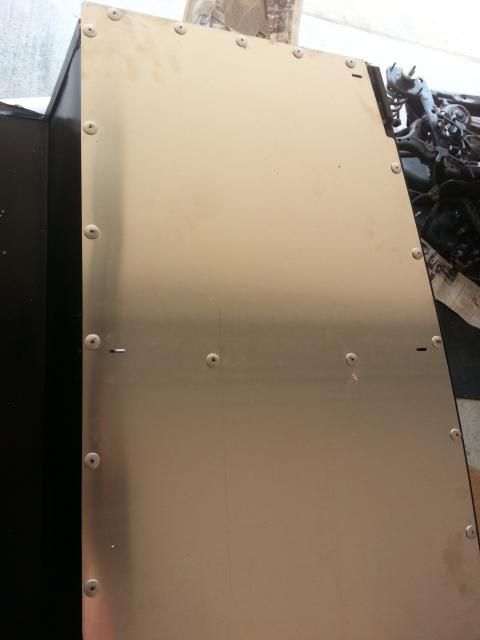
Next up was the front and rear bulkheads, same process here just clamp in place, drill, clean, then rivet in place. They were a bit fiddley as some of the panels didnt quite fit and some trimming was required. I dont quite understand it as the cuts seemed very deliberate but when I put it on the frame it was 2-3 millimeters off. I dont know if thats due to the type of frame i got or what. Either was with some light trimming and some persuation with a hammer they went into place nicely. After that I placed some grip tape on key areas to prevent ware and tear. Also gives your shoes something to hold onto when getting in and out of the car. That polished aluminum is slippery and I did my share of slipping before I put them on.
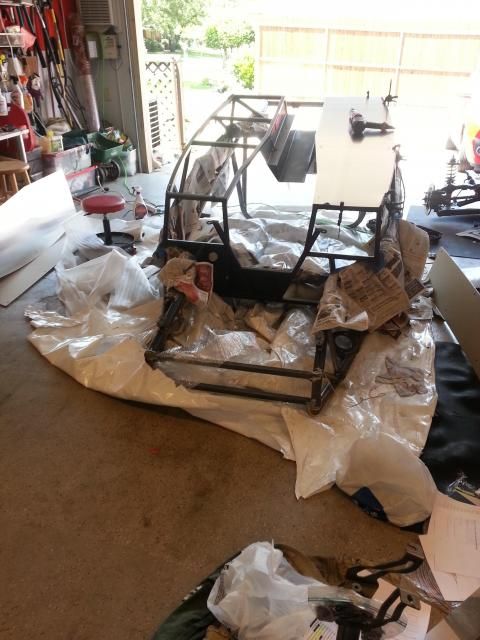
Oh and I almost forgot I also fitting the lower plexiglass covers which turned out awesome looking. They are tinted but you can still kinda see through them. Very neat looking. At this point it is really starting to come together!
This is where I am currently, Next up with be putting some tabs on the top part of the frame to fill the gaps in the diagonal tubing.
Cool, thanks for sharing.
Smile
93' LE #1136 - FM II
250k miles
Oh snap, didn't see that this thread got updated. I'm still up to help.
 Posting Permissions